
Part of a series of blog posts:
- Step 1: Taking snapshots
- Step 2: Uploading to the cloud (this post)
- Step 3: this is work in progress
Step 2: Upload to the cloud
For the creation of the timelapse itself, I will be using C# and the code will run on Azure. I've been writing C# almost daily since 2006. So this is what would work for me (and not take too much time doing it either).
There is no integration or service readily available in Home Assistant that will allow you to upload files to Azure Blob storage. RESTful Command is a way to execute HTTP calls, but I didn't see how I could pass the contents of my image as payload (template syntax won't get this far).
I decided to code my way out of this, like any developer would do.
You can upload a file to Azure Blob storage using an official SDK (currently available in 7 languages) or just plain HTTP requests. For simplicity I chose the HTTP request. You could probably swap some parts of the code to upload to other cloud storage that supports HTTP requests.
Unfortunately I haven't written any real Python. But I knew of 2 projects that offer .NET / C# integration in Home Assistant: C# for Home Assistant and NetDaemon. I picked the first, without any reason other than it seemed to be easier to set up.
C# for Home Assistant
Setting up C# for Home Assistant took only a few minutes.
It's detailed on the wiki of the project. In short: install add-on, have samba running (already did), map network drive, open folder in VS Code, add user secrets and start coding.
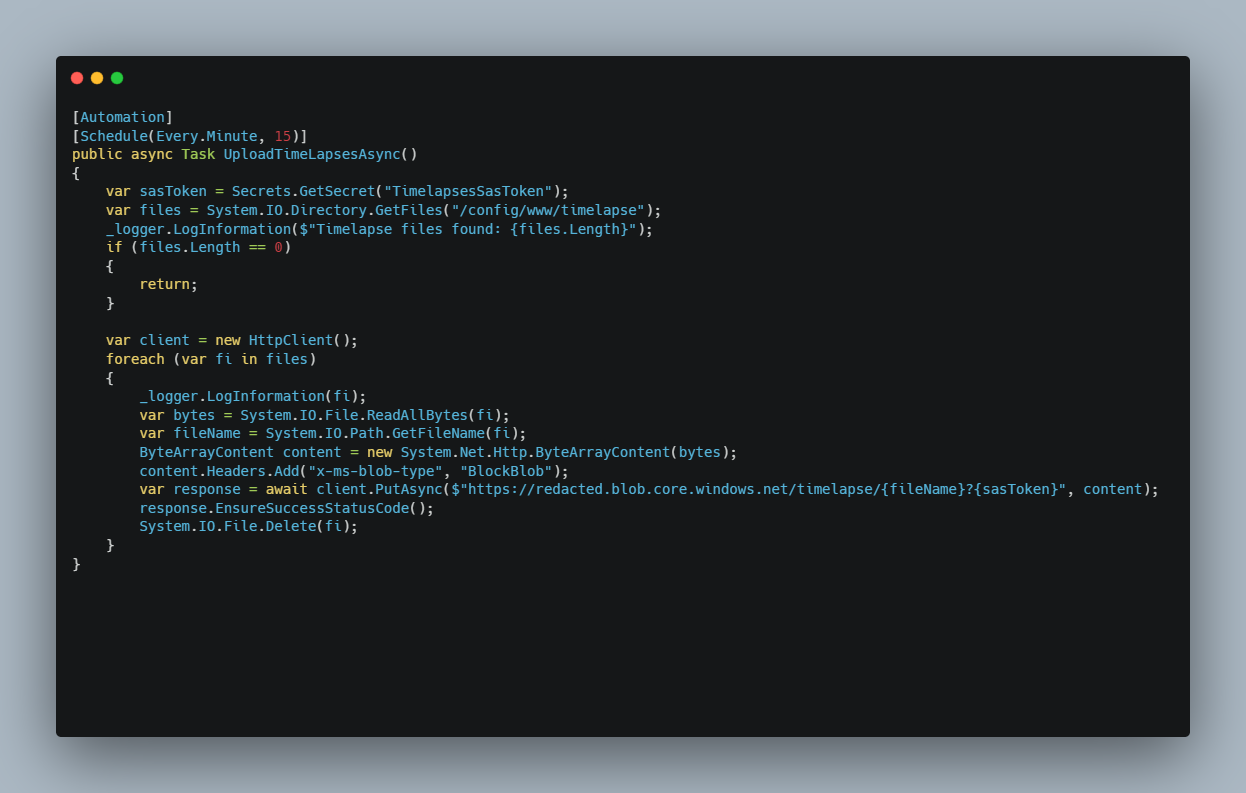
The code short and simple. Loop through the files, read the content, PUT on Azure and clean up.
[Automation]
[Schedule(Every.Minute, 15)]
public async Task UploadTimeLapsesAsync()
{
    var sasToken = Secrets.GetSecret("TimelapsesSasToken");
    var files = System.IO.Directory.GetFiles("/config/www/timelapse");
    _logger.LogInformation($"Timelapse files found: {files.Length}");
    if (files.Length == 0)
    {
        return;
    }

    var client = new HttpClient();
    foreach (var fi in files)
    {
        _logger.LogInformation(fi);
        var bytes = System.IO.File.ReadAllBytes(fi);
        var fileName = System.IO.Path.GetFileName(fi);
        ByteArrayContent content = new System.Net.Http.ByteArrayContent(bytes);
        content.Headers.Add("x-ms-blob-type", "BlockBlob");
        var response = await client.PutAsync($"https://redacted.blob.core.windows.net/timelapse/{fileName}?{sasToken}", content);
        response.EnsureSuccessStatusCode();
        System.IO.File.Delete(fi);
    }
}
I use a timer as workaround. There is no direct way of starting the C# automation from my 'snapshot automation' (see Step 1) other that using helpers or yet another workaround as described in the wiki. The timer hardly impacts my system.
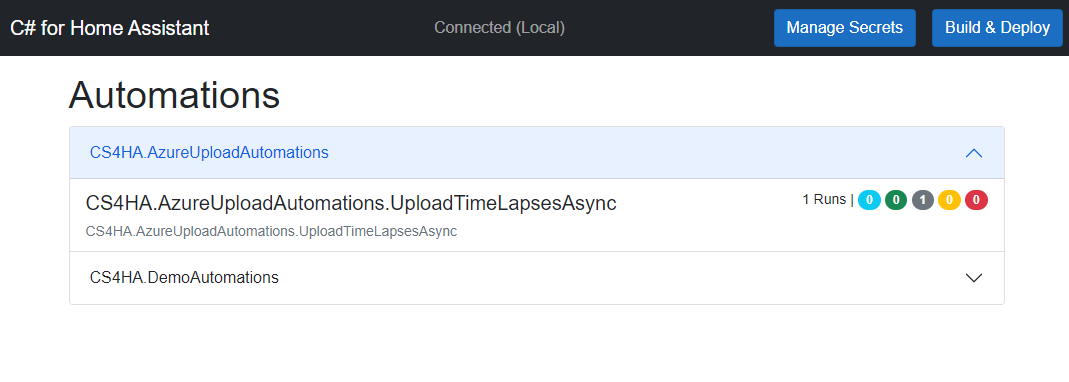
The add-on has a basic UI to list the automations. It can also show the logs, which I is extremely useful.
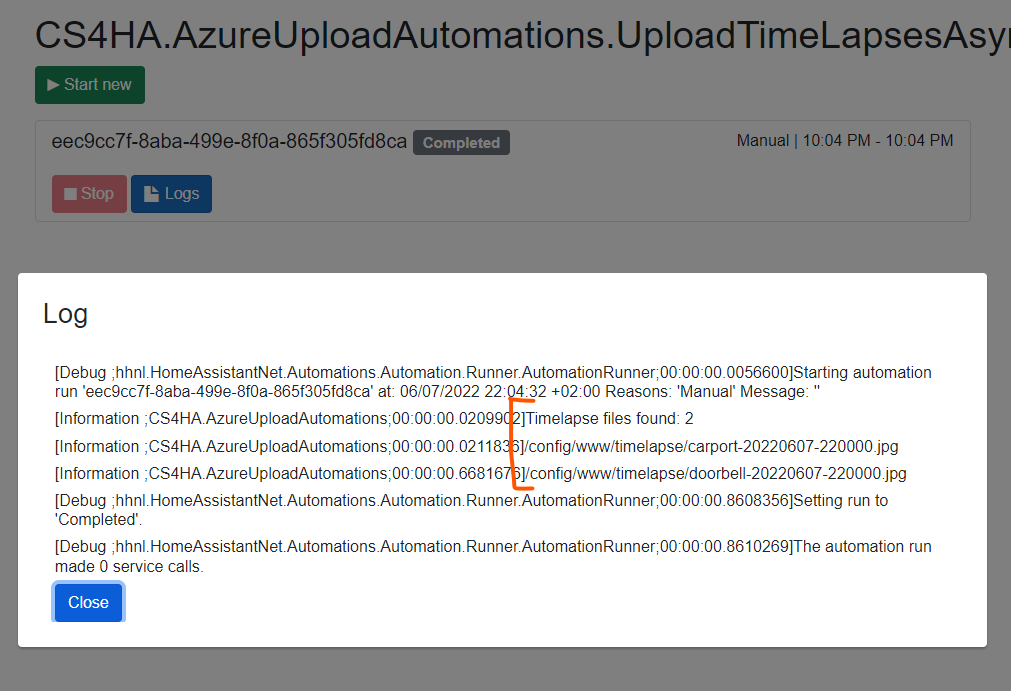
Drilling down into the logs we see that 2 images were uploaded.
It took .4 seconds read and upload the first file (513.13 KiB).
The second one was only .2 seconds (276.14 KiB).
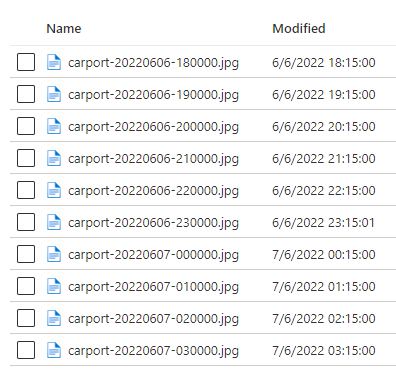
The uploaded files in the Azure portal.
In step 3 will we create the timelapse using C#. The post will follow soon.
If you know how I would write this in Python and integrate that in HA, please let me know in the comments.