
Part of a series of blog posts:
- Step 1: Taking snapshots (this post)
- Step 2: Uploading to the cloud
- Step 3: (this is work in progress)
I have a Unifi setup at home including some of their cameras. The mobile application has this really great feature where you can scroll through the timeline and the view updates instantly. It's like a fluent timelapse that you control.
This brought me to the idea that I want to created timelapses from snapshots. I have the Unifi integration set up in Home Assistant and my cameras are available as entities already. It shouldn't be that hard to get the job done, right?
Step 1: Taking snapshots
Home Assistant already has a service to take snapshots, and combined with the time pattern trigger you can easily save an image at regular interval.
The only tricky part was to find a place where files could be written. I didn't see any errors with my initial folder, but also didn't see any files created. Must have been a permission issue. After some digging I changed the path to /config/www and step 1 was complete.
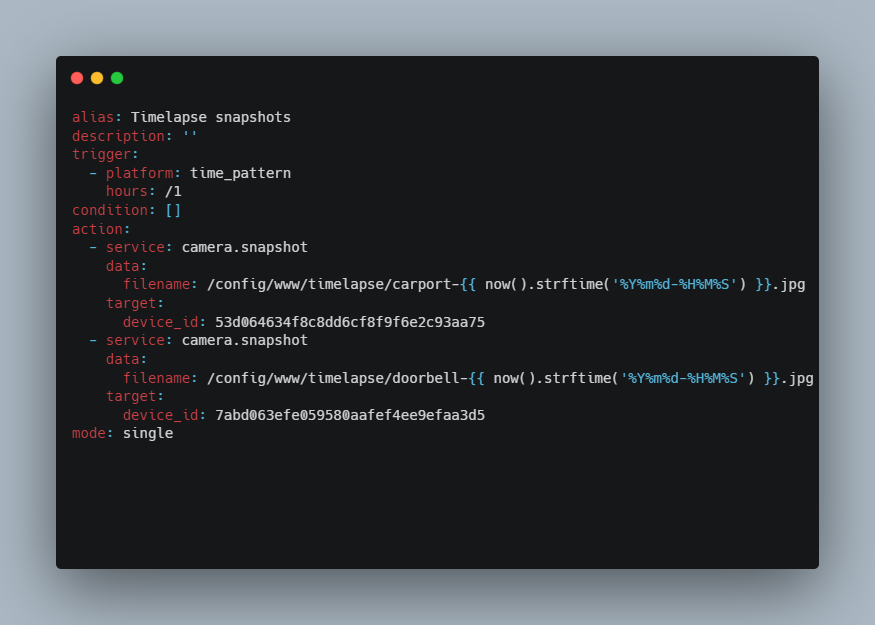
Here's the YAML for my automation, where I take snapshots for 2 separate cameras, at an hourly interval.
alias: Timelapse snapshots
description: ''
trigger:
  - platform: time_pattern
    hours: /1
condition: []
action:
  - service: camera.snapshot
    data:
      filename: /config/www/timelapse/carport-{{ now().strftime('%Y%m%d-%H%M%S') }}.jpg
    target:
      device_id: 53d064634f8c8dd6cf8f9f6e2c93aa75
  - service: camera.snapshot
    data:
      filename: /config/www/timelapse/doorbell-{{ now().strftime('%Y%m%d-%H%M%S') }}.jpg
    target:
      device_id: 7abd063efe059580aafef4ee9efaa3d5
mode: single
Continue to step 2 where I upload files from Home Assistant to the cloud.