
With the classic UI builds, we could easily access the option to tag source with every build or successful build.
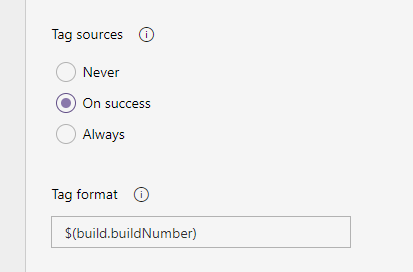
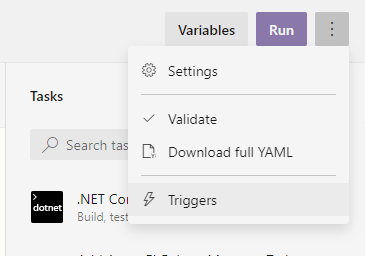
When using Azure YAML Pipelines, this is still possible, but you really have to go out of your way to get to that option. From the YAML edit screen you'll need to go to the Triggers option via the kebab menu icon. After this you'll find the Tag sources option in the same place as before.
Self checkout
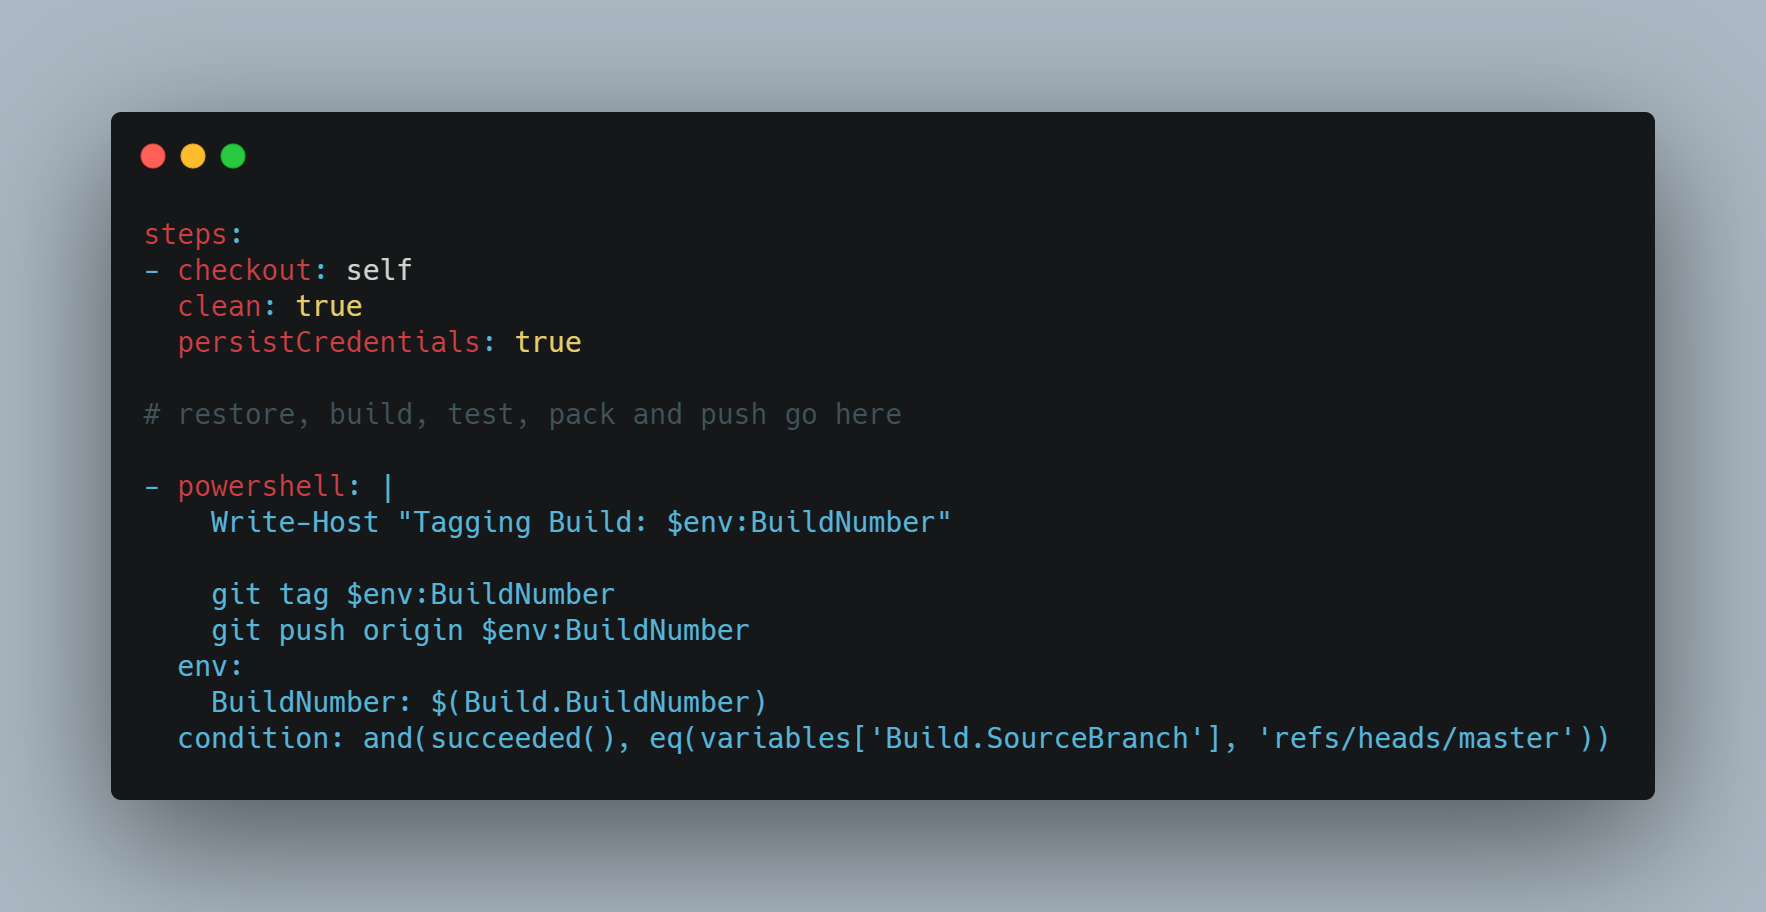
However, there is an undocumented way of doing this straight in the YAML.
You'll need to add an explicit step to checkout the code at the end of your build steps. Call the git tag command to add the (lightweight) tag from the command line, followed by a git push. Here's a slimmed down version using PowerShell:
steps:
- checkout: self
  clean: true
  persistCredentials: true

# restore, build, test, pack and push go here

- powershell: |
    Write-Host "Tagging Build: $env:BuildNumber"

    git tag $env:BuildNumber
    git push origin $env:BuildNumber
  env:
    BuildNumber: $(Build.BuildNumber)
  condition: and(succeeded(), eq(variables['Build.SourceBranch'], 'refs/heads/master'))
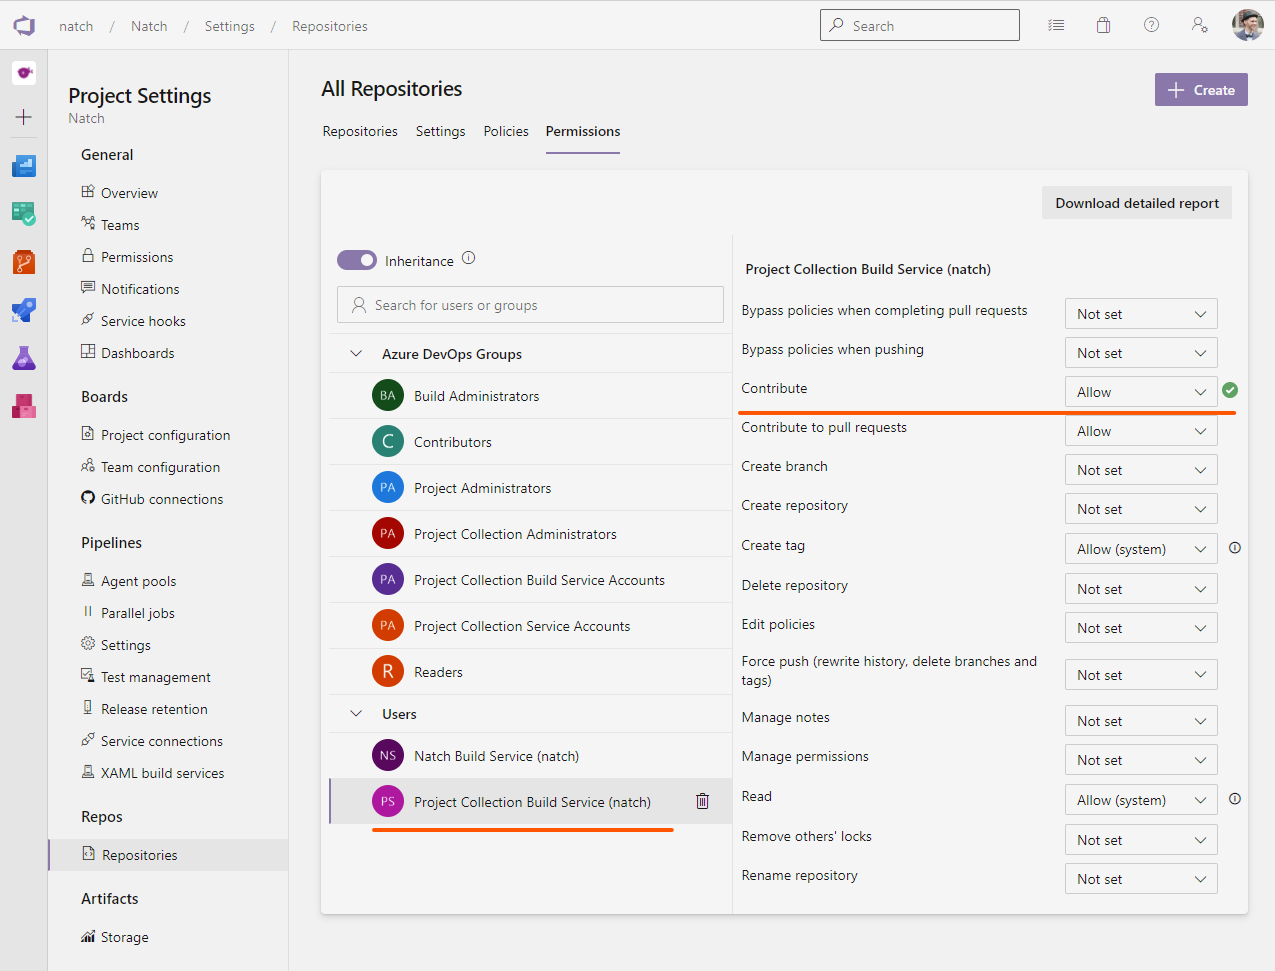
Permissions
You need the Git 'GenericContribute' permission to perform this action.
The persistCredentials option is required to allow all steps after the checkout to have access to the auth token for the git push operation.
You'll also need to set the Contribute permission to Allowed for the Build Service user .
A big advantage of placing the tagging inline is that I can now use the same YAML file for CI builds on Pull request and CD builds for approved PRs that go into master.
More information about the checkout step: https://docs.microsoft.com/en-us/azure/devops/pipelines/yaml-schema?view=azure-devops&tabs=schema%2Cparameter-schema#checkout
PS: You can use PowerShell Core if you need cross-platform. Or switch to bash.